Kubernetes basics
featuredImage: featured-image.png
introduction
In this post, we will set up a Kubernetes cluster with Linode and deploy a dummpy webpage.
If you want to learn more about Kubernetes, I can recommend the kubernetes 101 tutorial by  Jeff Geerling.
kubectl
The steps below are executed on macOS in zsh. For other operating systems have a look at https://kubernetes.io/docs/tasks/tools/.
First, check if kubectl is already installed.
if command kubectl &> /dev/null; then
    echo "kubectl already installed."
    echo "See: $(which kubectl)."
    exit
fi
If that is the case you are ready to go. However, check for updates. Otherwise, let us download the latest binary.
cd
# rel can by any other valid release
REL=$(curl -L -s https://dl.k8s.io/release/stable.txt)
curl -LO "https://dl.k8s.io/release/${REL}/bin/darwin/amd64/kubectl"
sudo chmod +x kubectl
sudo mv kubectl /usr/local/bin
You can also move the binary to any other place as long as the absolute path of the base directory appears in the environment variable $PATH. As always, to persist changes like export PATH=$PATH:/path/to/kubectl, make sure to add that to your .zshrc.
You can verify the installation by typing kubectl version.
To ease your life, we use an alias for kubectl and enable autocompletion. Add this to your .zshrc:
alias k="kubectl"
complete -F __start_kubectl k
source <(kubectl completion zsh)
The change takes effect after your .zshrc has been sourced.
the cluster
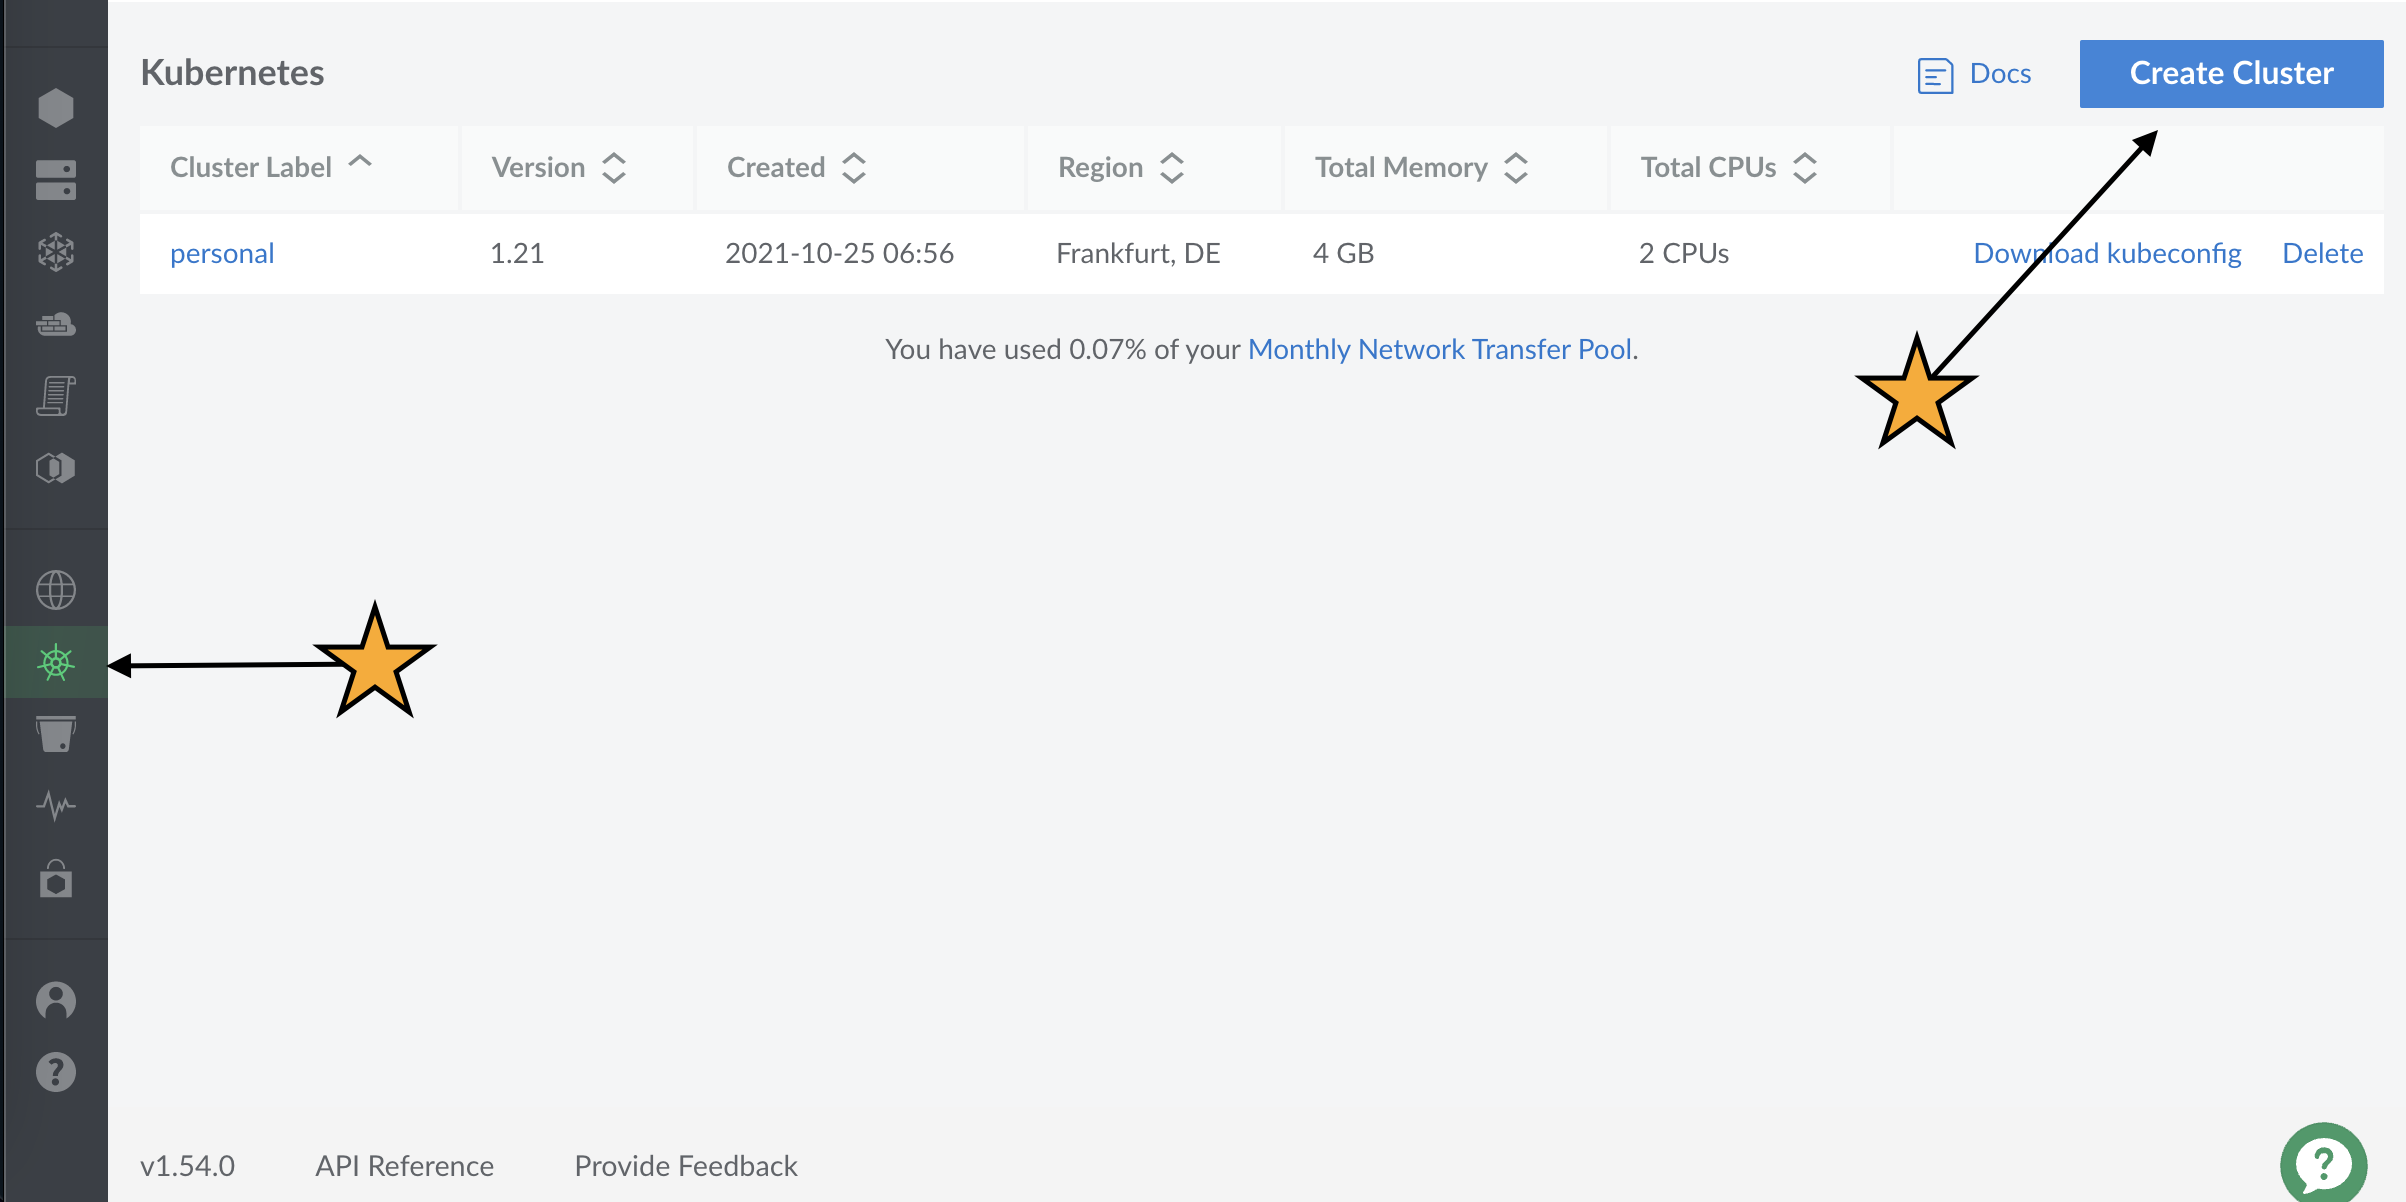
As already mentioned, I prefer Linode as cloud provider. If you don’t already have a Linode account, go to Linode and register. Once you are logged in, choose “Kubernetes” on the left panel and click “Create Cluster”.
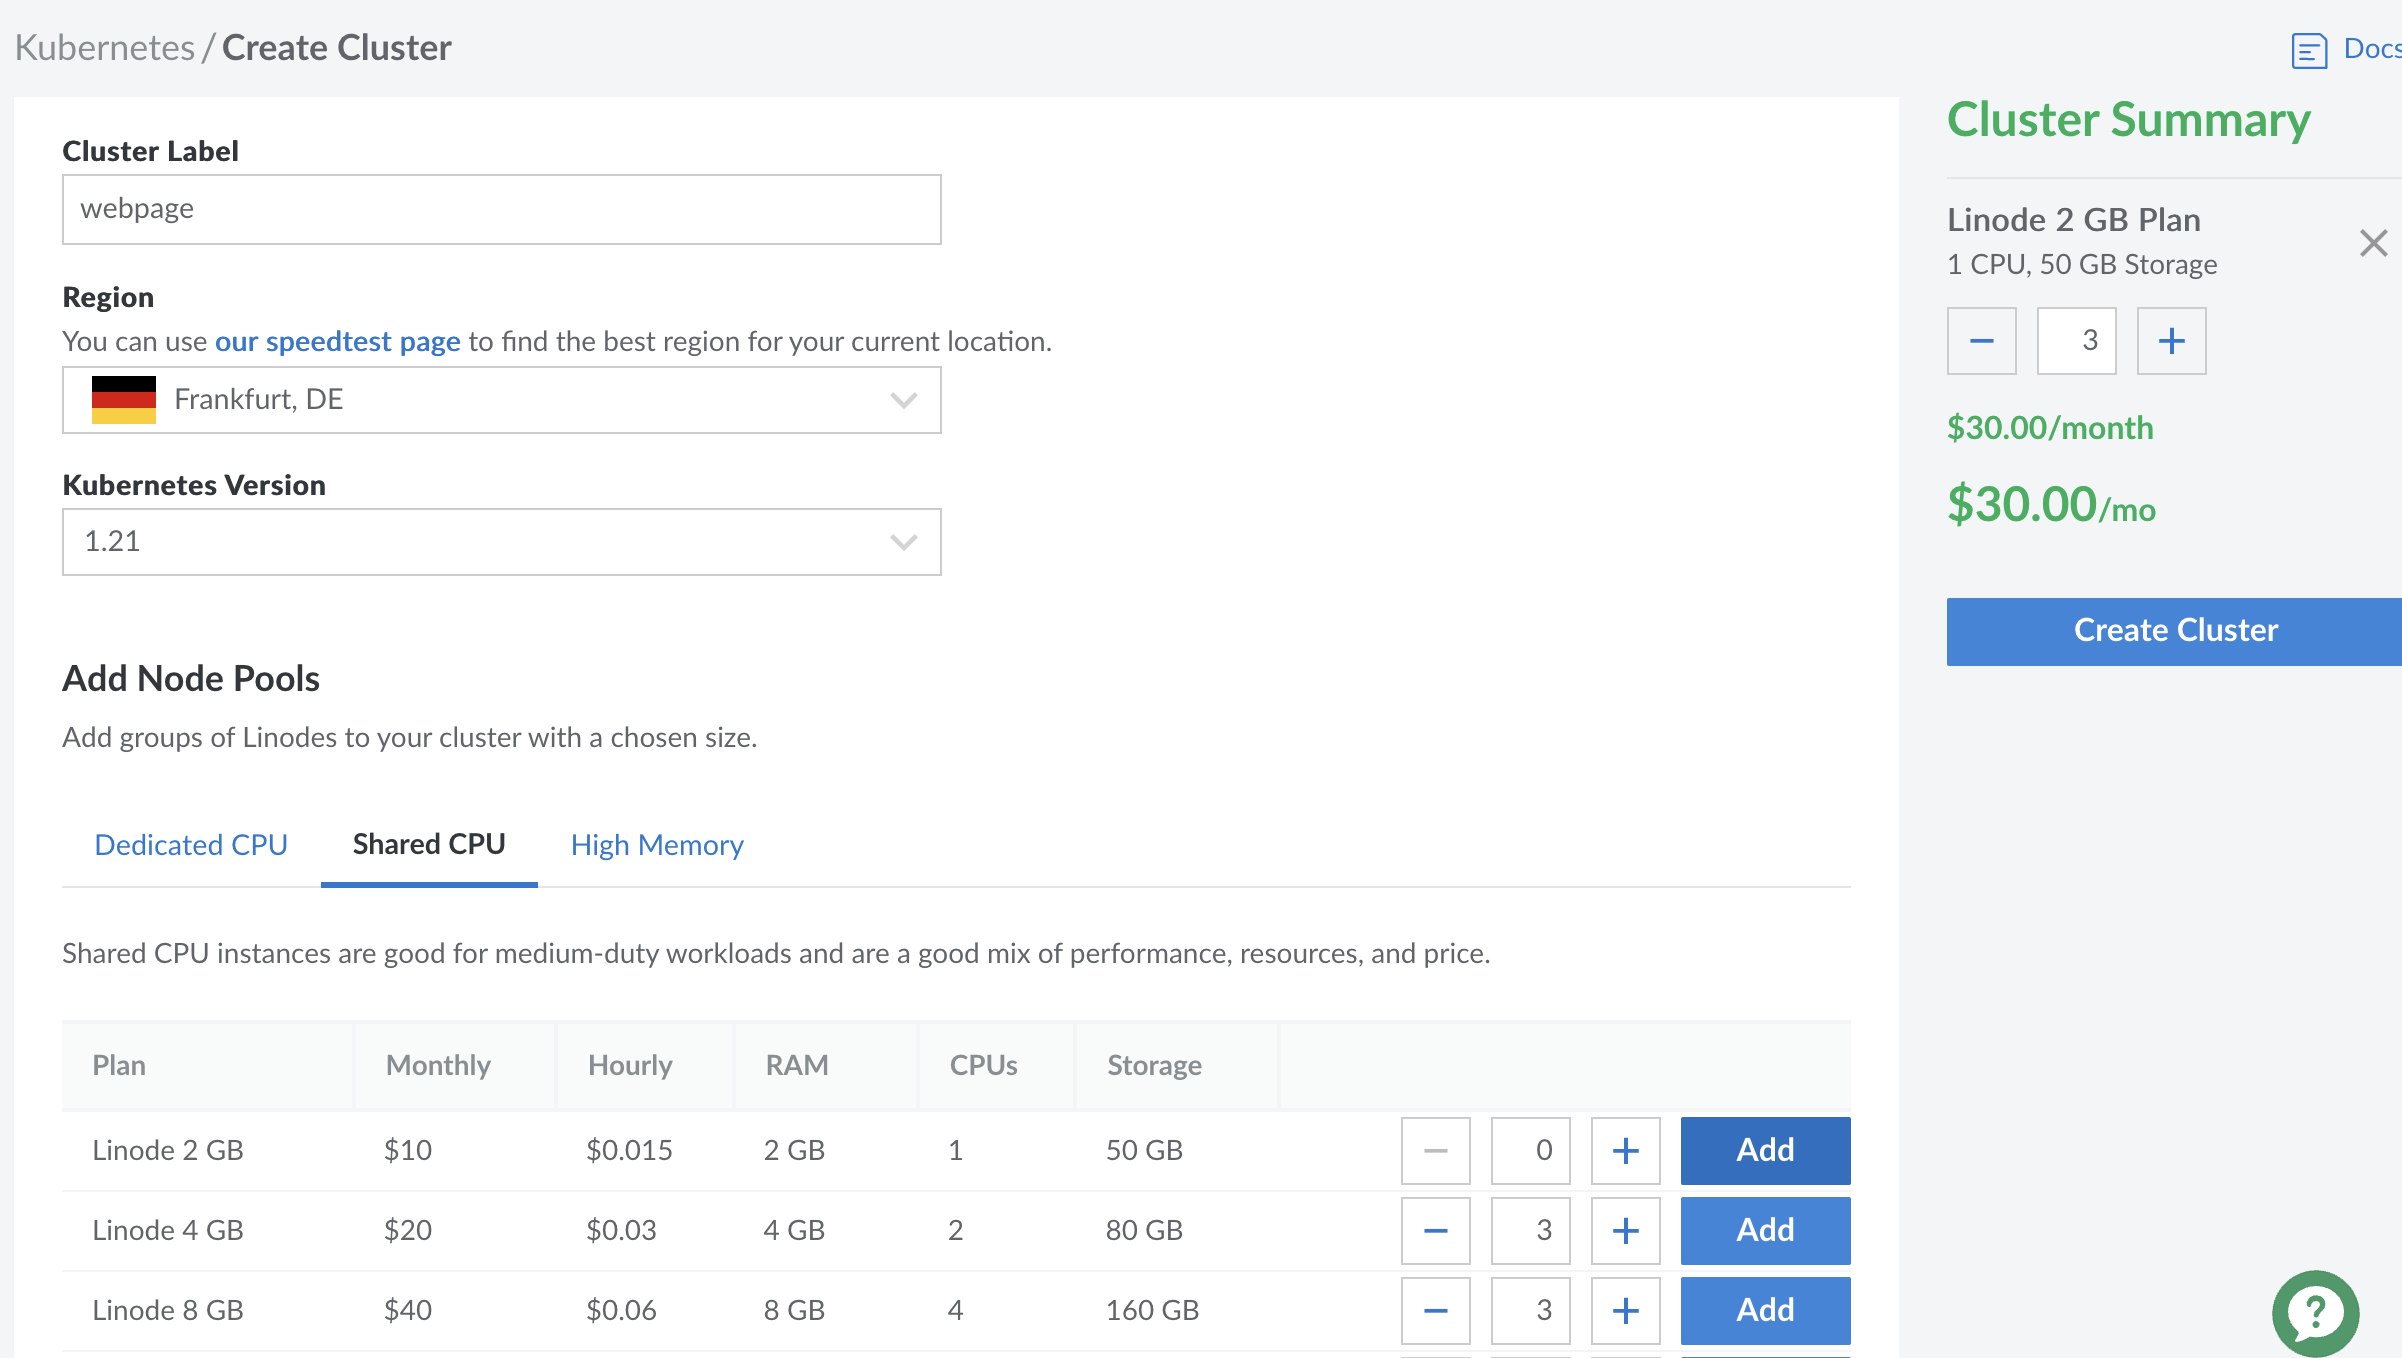
Next, you choose a label for your cluster, a region where the nodes will live and which type of nodes you want to use. For the region, it makes sense to pick a geographically close one. This reduces the latency.
For the tutorial, I chose two Linodes with Shared CPU and 2 GB memory. However, to have enough redundancy, and to make Kubernetes what it is supposed to do, you should have three or more nodes.
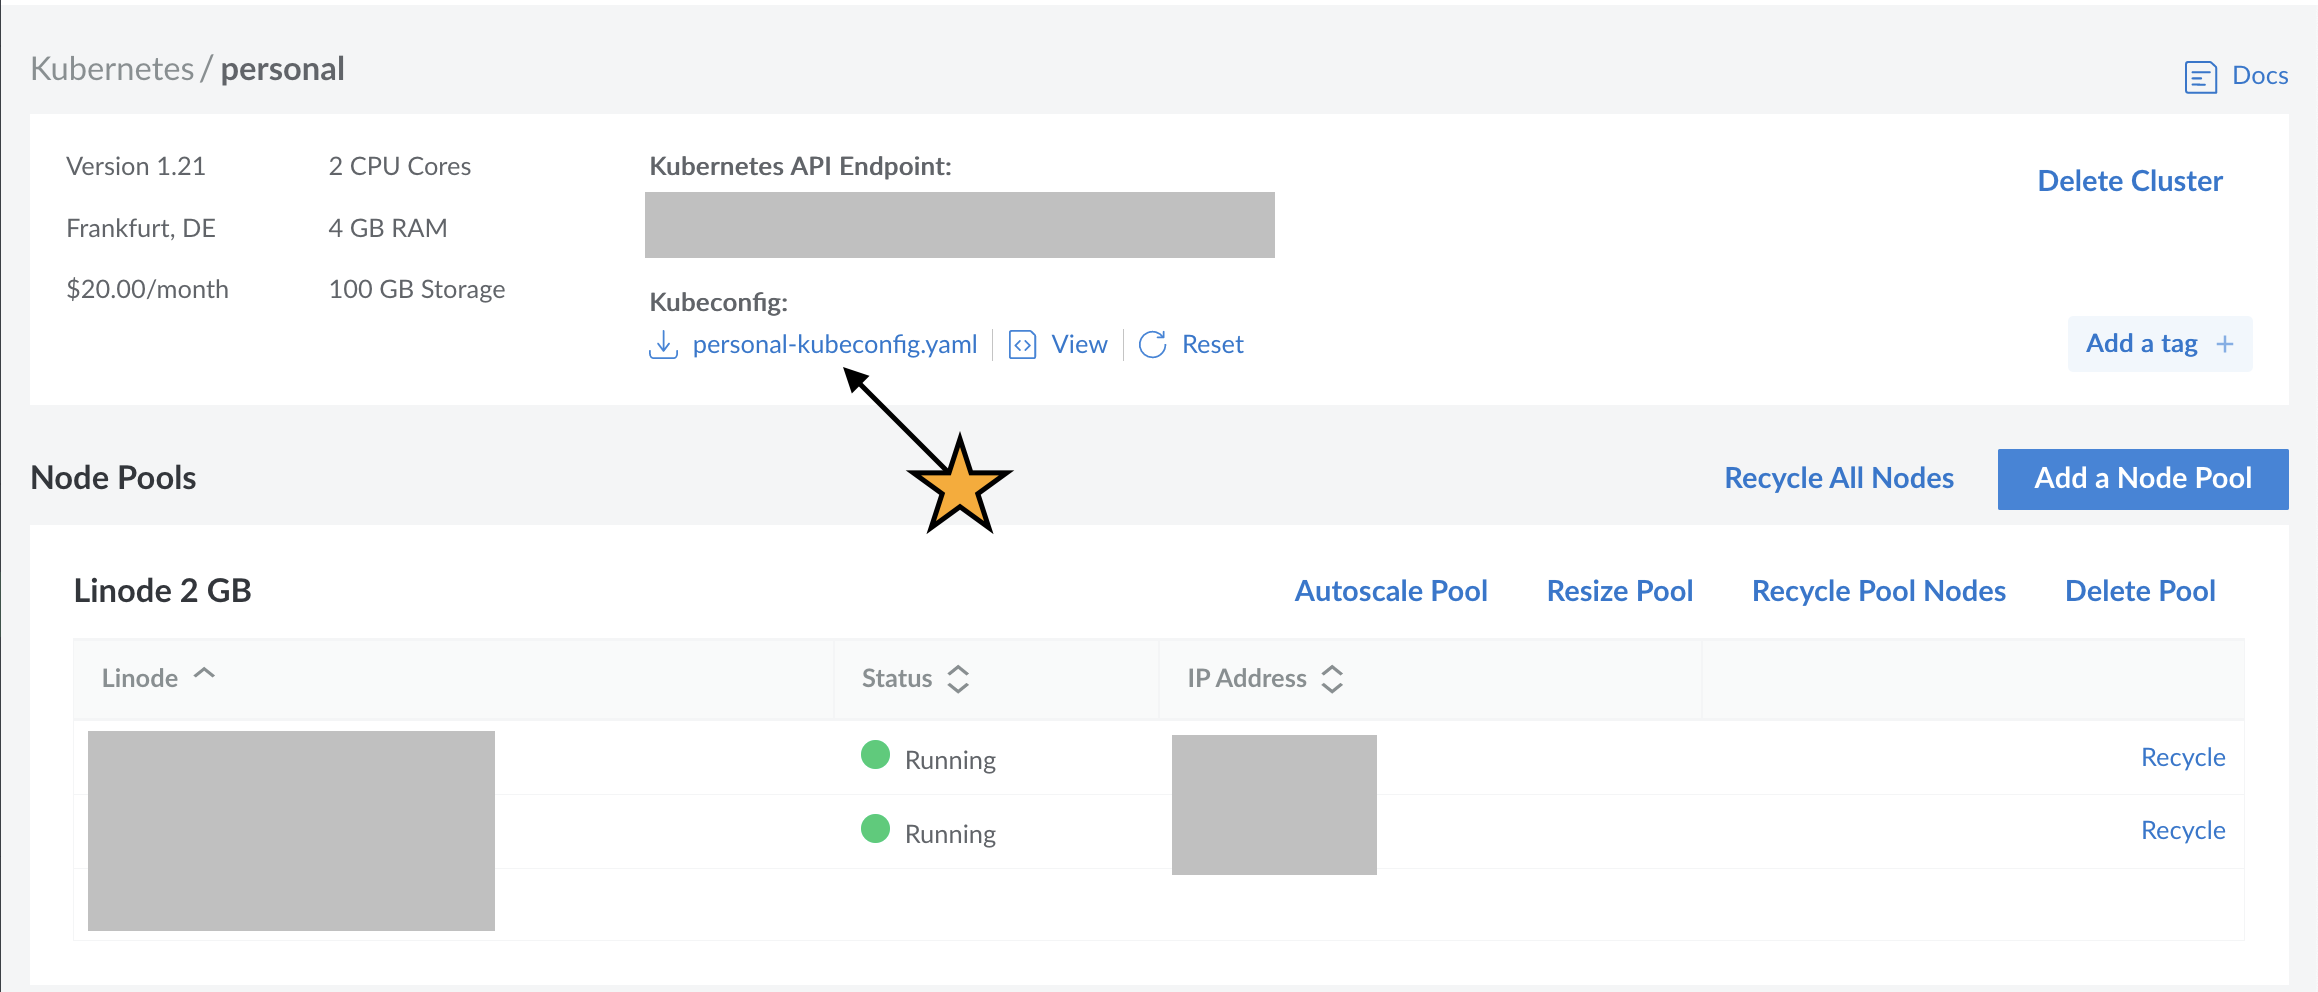
While the nodes are starting up, you can already download the cluster specific kubeconfig.yaml.
To make the kubeconfig available to kubectl, the $KUBECONFIG variable is used.
The default location is ~/kubeconfig.yaml. Make sure to add the variable to your .zshrc:
echo "export KUBECONFIG=~/kubeconfig.yaml" >> ~/.zshrcAlso, make sure to set permissions. Anyone with the kubeconfig file has full access to the cluster. This is done with
chmod 400 ~/kubeconfig.yamlThat gives the owner read permissions to the kubeconfig.yaml.
If everything went as expected, you can verify the setup by typing k get nodes. The output should show all nodes in your cluster.
a toy web app
Our first deployment will be a toy web application running on an Nginx webserver. Later, we will refine this deployment to host our productive website.
With docker we would simply do a
docker run --rm -d -p 8080:80 nginx:latestThat would start a single Nginx container with its port 80 being forwarded to port 8080. You can check that the service is running with a
curl localhost:8080.
In Kubernetes, we have to define a deployment. The deployment.yaml looks as follows:
apiVersion: apps/v1
kind: Deployment
metadata:
  name: nginx
  namespace: web
  labels:
    app: nginx
spec:
  replicas: 1
  selector:
    matchLabels:
      app: nginx
  template:
    metadata:
      labels:
        app: nginx
    spec:
      containers:
      - name: nginx
        image: nginx:latest
        ports:
        - containerPort: 80
Before applying the yaml, we create a namespace web, which bundles all deployments regarding our web application. Then, we can apply the deployment and watch for pods to start.
k create ns web
k apply -f deployment.yaml
k get pods -n web -w
Now, we have a single pod with an Nginx server running in it. To make the web app accessible, we first have to deploy a service:
apiVersion: v1
kind: Service
metadata:
  namespace: web
  name: nginx-service
spec:
  selector:
    app: nginx
  type: ClusterIP
  ports:
  - protocol: TCP
    port: 80
targetPort: 80targetPort must match the port the Nginx server is listening on. The spec.selector is responsible for assigning pods to the service, as defined in spec.selector.matchLabels in the deployment.By using kubectl we can forward the service port to our local network:
k port-forward -n web svc/nginx-service 8001:80You should now be able to see a welcome page at localhost:8001.
Another way to expose the service is to change spec.type to NodePort. That opens a static port on the node IP address. The port range is 30000-32767. Let us deploy the following service:
apiVersion: v1
kind: Service
metadata:
  namespace: web
  name: nginx-service-node-port
spec:
  selector:
    app: nginx
  type: NodePort
  ports:
  - protocol: TCP
    port: 80
    targetPort: 80
    nodePort: 31100
Next, we have to find the external IP of one of the nodes. You can inspect k get nodes -o wide or get one IP directly by using the json output format together with jq:
IP=$(k get nodes -o json | jq '.items[0].status.addresses | .[] | select(.type == "ExternalIP") | .address' | sed 's/\"//g')You can then check if the service works by curling $IP:31100.
I hope you got a first impression of how kubernetes works and how to apply deployments.